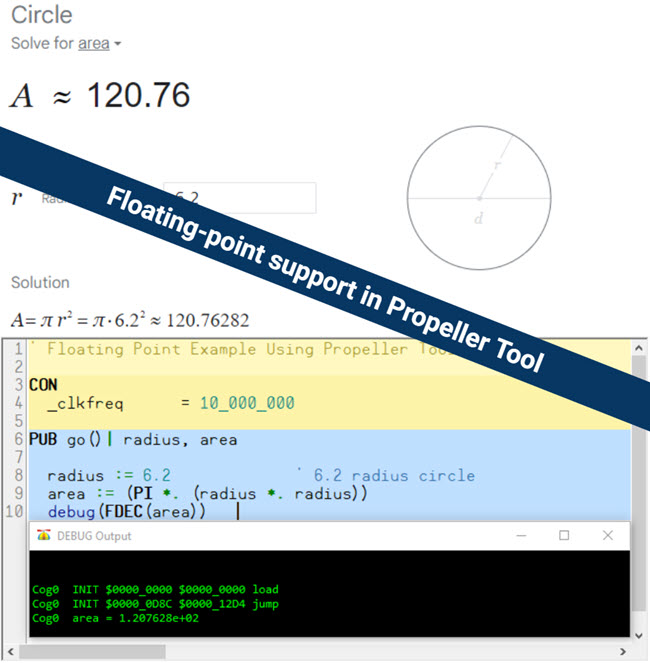
Description #
Run-time floating-point operators have recently been added to Spin2’s language interpreter. These operators utilize the 32-bit IEEE-754 floating-point format. Parallax’s Propeller Tool (ver 2.6.2 and higher) and FlexProp (ver. 5.9.6 and higher) support the use of floating-point math. The largest possible floating-point number that can be used is 3.4e+38.
Floating-point variables in Spin2 are really just LONG variables, but they get treated as floats when the special floating-point operators are used on them. The floating-point operators have the same precedence as the normal integer operators and often use the same symbol, but with a period after each:
-. value        = negate
FABS value      = absolute
value *. value  = multiply
value /. value  = divide
value +. value  = add
value -. value  = negate
value <. value  = check for less-than, returns integer 0 or -1
value <=. value = check for less-than-or-equal, returns integer 0 or -1
value ==. value = check for equal, returns integer 0 or -1
value <>. value = check for not-equal, returns integer 0 or -1
value >=. value = check for greater-than-or-equal, returns integer 0 or -1
value >. value  = check for greater-than, returns integer 0 or -1
value <. value  = check for less-than, returns integer 0 or -1
FLOAT(integer)  = convert integer to float
ROUND(float)    = round float to integer
TRUNC(float)    = truncate float to integer
NAN(float)      = check float for not-a-number, returns integer 0 or -1
Floating-point constants must either have a decimal point and/or and “e” in them:
1.0
-. 5.0 remember to always use the floating-point negate
1e6
1e-9 "e" can be followed by "-", "+", or just a number
6.02e+23
6.02e23
Floating-point values may be displayed using these functions:
FDEC(value)
FDEC_ARRAY(hub_pointer, size)
FDEC_REG_ARRAY(reg_pointer, size)
Example #1: Propeller Tool for Windows Using DEBUG
The most simple and direct way of displaying a floating-point number is using Propeller Tool for Windows with the new DEBUG statement, as shown in this example. The output from the program is included below, for reference.
' Floating Point Example Using Propeller Tool Debug

CON
  _clkfreq      = 10_000_000

PUB go()| radius, area

  radius := 6.2             ' 6.2 radius circle
  area := (PI *. (radius *. radius))
  debug(FDEC(area))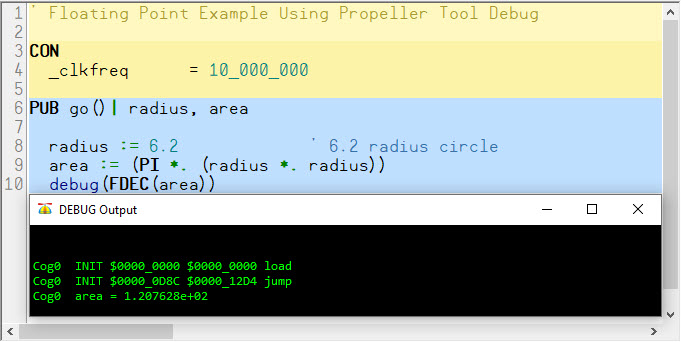
When the DEBUG command is used, the serial port is held by the DEBUG Output window and you will not be able to use Parallax Serial Terminal.
Example #2: Propeller Tool for Windows Using Parallax Serial Terminal
Parallax Serial Terminal may be used to display a floating-point number using a method in jm_fullduplexserial.spin2. If X is the number of digits you would like to display after the decimal point, multiply your floating-point value by 10.0^X and then convert it to a fixed point for display using %f in a formatted print statement. Alternatively, the dpdec() method may also show the value right of the decimal point.
The relevant lines of code are highlighted below (and note that the debug statements are removed).
' Floating Point Example Using PST or ANSI Terminal

CON
  _clkfreq      = 10_000_000
  BR_TERM  = 230_400
  #0, T_PST, T_ANSI
  T_TYPE = T_PST

obj
  term   : "jm_fullduplexserial"
  ansi   : "jm_ansi"

PUB go()| i, radius, area

  term.tstart(BR_TERM)
  wait_for_terminal(true)

'' Area = PI*R*R example
  radius := 6.2             ' 6.2 radius circle
  area := (PI *. (radius *. radius))
  area := round(area *. 1000000.0)
  term.fstr1(string("Area = %.6f\r"), area)

pub wait_for_terminal(clear)

'' Wait for terminal to be open and key pressed

  term.rxflush()
  term.rx()
  if (clear)
    clear_screen()

pub clear_screen()

  if (T_TYPE == T_PST)
    term.tx(term.CLS)
  else
    term.str(ansi.hide_cursor())
    term.str(ansi.home())
    term.str(ansi.cls())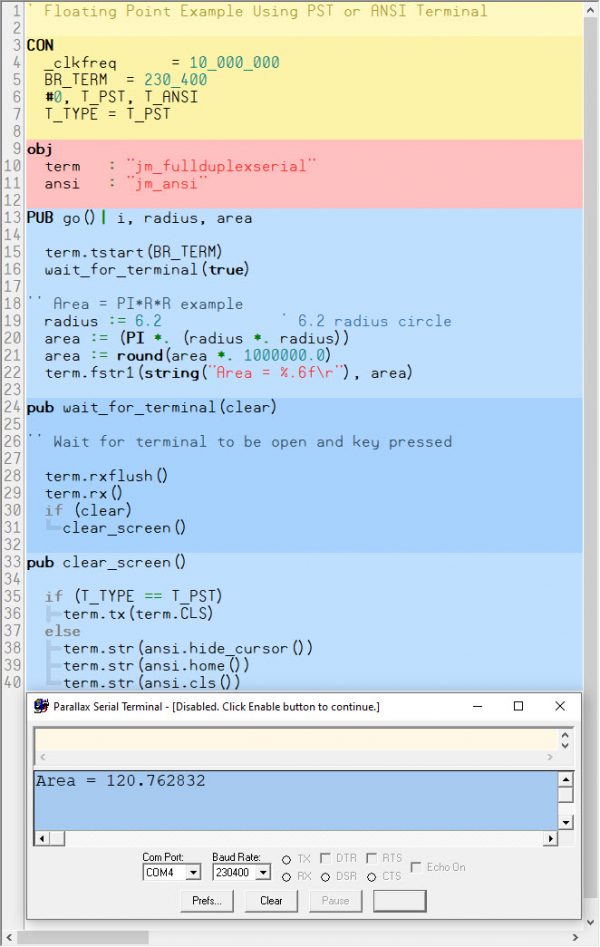
Example #3: FlexProp and ANSI Terminal
Eric Smith’s FlexProp may be used the same way as Propeller Tool, with the additional benefits of Mac and Linux. To use Terminal with FlexProp, change the T_TYPE to T_ANSI and compile.
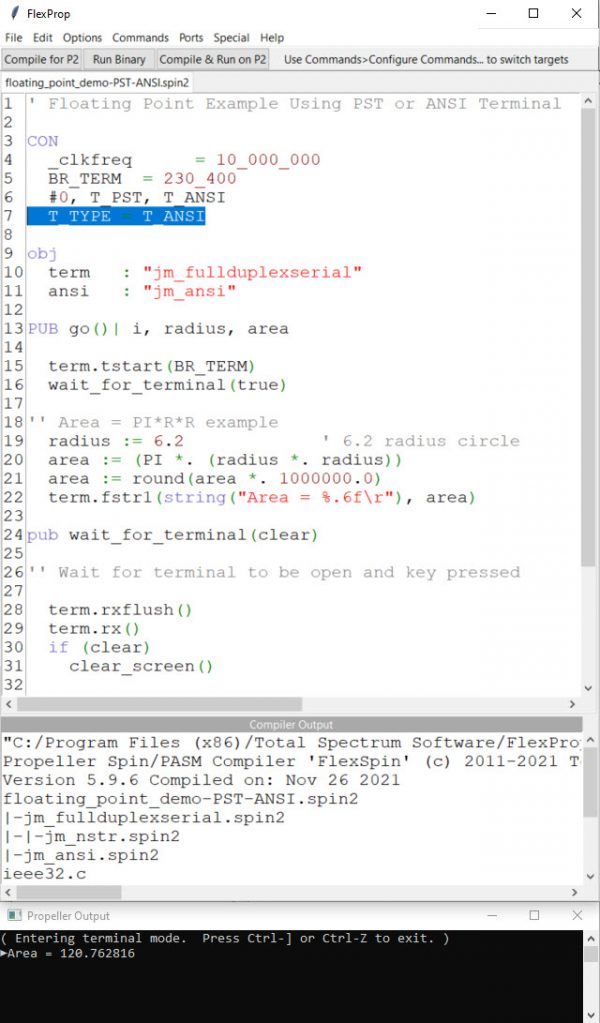
To use the DEBUG commands in FlexProp, go to Options | BRK Debug.


